
Quickly start up your Unity integration with Leanplum
This article is your first step to activating the Leanplum Unity SDK. Once completed, you will have access to all the goodness Leanplum provides. Follow the steps below.
The Leanplum Unity SDK includes optimization for both a Unity Native implementation as well as wrappers around the native iOS and Android SDKs. This setup allows us to provide feature parity on the iOS and Android platforms while still retaining support for other Unity platforms.
Unity Standalone includes the Unity Supported Platforms. For example, Windows and MacOS.
Those platforms use our Unity Native (Standalone) SDK support, bringing Leanplum functionalities beyond mobile, to desktop and other devices. This enables enriching the app experience on all customer's platforms.
It also boosts the developer productivity as Leanplum features can be directly integrated and tested from the Unity Editor without the need to export.
On mobile devices such as iOS and Android, the Unity SDK takes advantage of our native mobile SDKs. This delivers the performance and functionalities native to the mobile OS, while providing Unity C# interface to interact with directly from your app code.
All of the above is wrapped together in one Unity package.
The following matrix shows the features supported by each platform:
| Feature | iOS | Android | Standalone (Unity Editor, Windows, MacOS etc) |
|---|---|---|---|
| Data modeling | ✓ | ✓ | ✓ |
| Analytics | ✓ | ✓ | ✓ |
| In-app messaging | ✓ | ✓ |
|
| Push notifications | ✓ | ✓ | |
| App Inbox | ✓ | ✓ | ✓ |
| Variables | ✓ | ✓ | ✓ |
| AB Testing | ✓ | ✓ | ✓ |
| Campaigns | ✓ | ✓ | ✓ |
| Unity asset bundles | ✓ |
Unity SDK versions for Android XAll our current versions of Android/Unity SDK are optimized for AndroidX. If you have not migrated to AndroidX, use the Unity SDK versions 1.6.X. Otherwise, we recommend using the latest version of the Unity SDK 6.0.0.
STEP 1: Install the SDK
The first step in installing the Unity SDK is to download the latest .unitypackage in the Leanplum Unity SDK.
A few notes:
- We support Unity LTS supported versions for Android, iOS, and Standalone platforms.
Leanplum Unity SDK 2.1.0+ requires Android XIn version 2.1.0 and above, we use Leanplum Android SDK version that supports only Android X libraries
STEP 2: Import the UnityPackage into your project
Once downloaded, import all the resources and classes. Do not import the LeanplumWrapper.cs class if you have modified it already, otherwise, it will override your changes.
Older versions below 3.0.0
Make sure you import the directories Plugins and Standard Assets. Optionally import Editor, and/or LeanplumSample to include a sample project demonstrating how to manipulate the speed of rain with a Leanplum variable.

A. Add the Leanplum Prefab
Copy the Leanplum Prefab from Standard Assets/Leanplum into the first scene in your project that loads. Make sure the prefab is linked with the script LeanplumWrapper.cs. This GameObject will persist across scene changes so you don't have to worry about adding it to other scenes.
.png")
B. Add your app keys
Copy your appId and clientKeys into the Leanplum GameObject inspector. You can find these in App Settings and clicking Keys & Settings.
.png")
C. Initialize the SDK
The code from theLeanplumWrapper.cs file initializes the SDK.
You can see how the SDK is initialized and where Leanplum.Start is called directly in the LeanplumWrapper.cs code in Github.
If you require asset bundle support on iOS and Android, you can switch to use the native Unity implementation on all platforms. However, this means that you will not get push notification support. Also, only basic in-app messages support will be available.
The code snippets below exist only in the LeanplumSDK namespace. You will need to add using LeanplumSDK to every source file as shown below that calls Leanplum's functions.
STEP 3: Run Your Build
Running Leanplum SDK from multiple Unity Editors simultaneously is not supported. If you do use multiple Unity Editor instances at the same time, pause the player when switching and starting from the next instance.
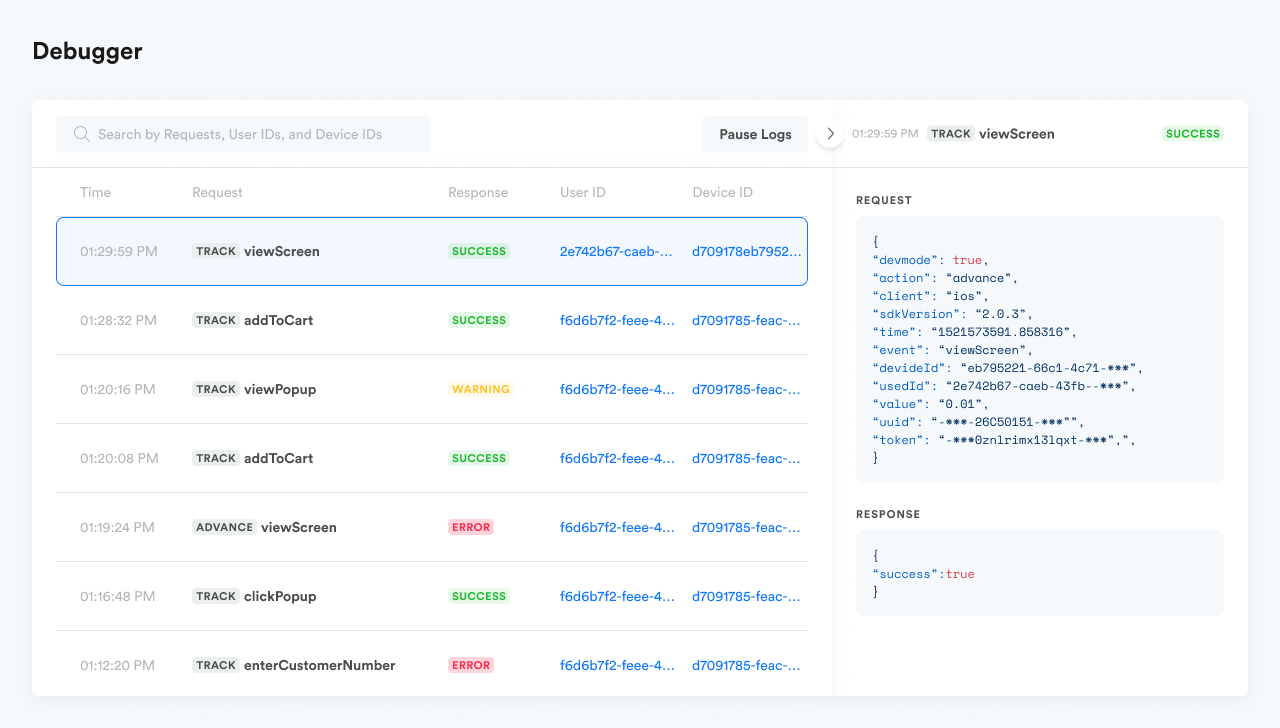
Build and run your app and see data start flowing into Leanplum. With your development key in your app delegate, you will be able to see all data flowing into Leanplum in our debugger. You can access our debugger dashboard at https://leanplum.com/dashboard#/help/debug
STEP 4: Register Your Test Device
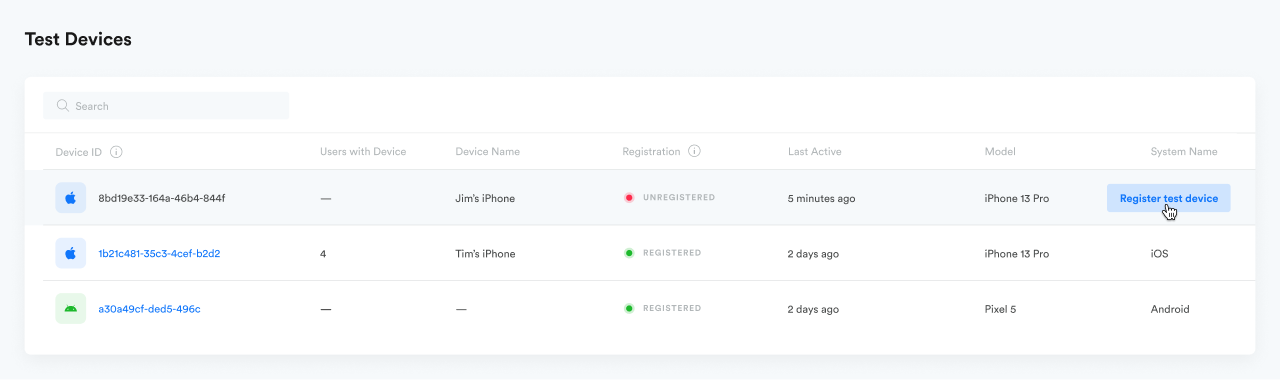
Registering your device as a test device will allow you to preview your messages, variable changes, and any other Leanplum projects. Follow the below to register. Visit https://leanplum.com/dashboard#/account/devices and click on "Register test device" to register your device
STEP 5: Complete Your Integration (NEXT STEPS)
Success! You have now successfully installed the Leanplum iOS SDK and registered a test device for further testing. This is an exciting first step on the journey to full integration with Leanplum.
To complete your integration with Leanplum, check out the below articles to learn more about your user data, tracking with Leanplum, variables, importing data and setting up messages.
Articles to Visit Next
- Collecting User Data
- Event Tracking
- State Tracking
- Variables
- Importing Data
- Setting Up Push Notifications
- Build Custom In-App Messages