Email setup
Before you can send your first email campaign, there are a few things you need to do:
Enable email on your account
After enabling email, your company will be provisioned a dedicated IP address for sending email, and you’ll need to perform some domain name (DNS) configuration. Don’t worry, our email support team will work with you through this process, which typically takes several business days.
To see whether email is enabled on your account:
- In the sidebar, click More and select App Settings.
- Open the Keys & Settings for your app.
- Click Email to open email settings. At the top of the screen, you can see if the app is enabled or disabled.

Select default email settings
Leanplum sets defaults for you, but we encourage you to check these settings before getting started. You can also override the defaults when creating an email in the Message Composer.
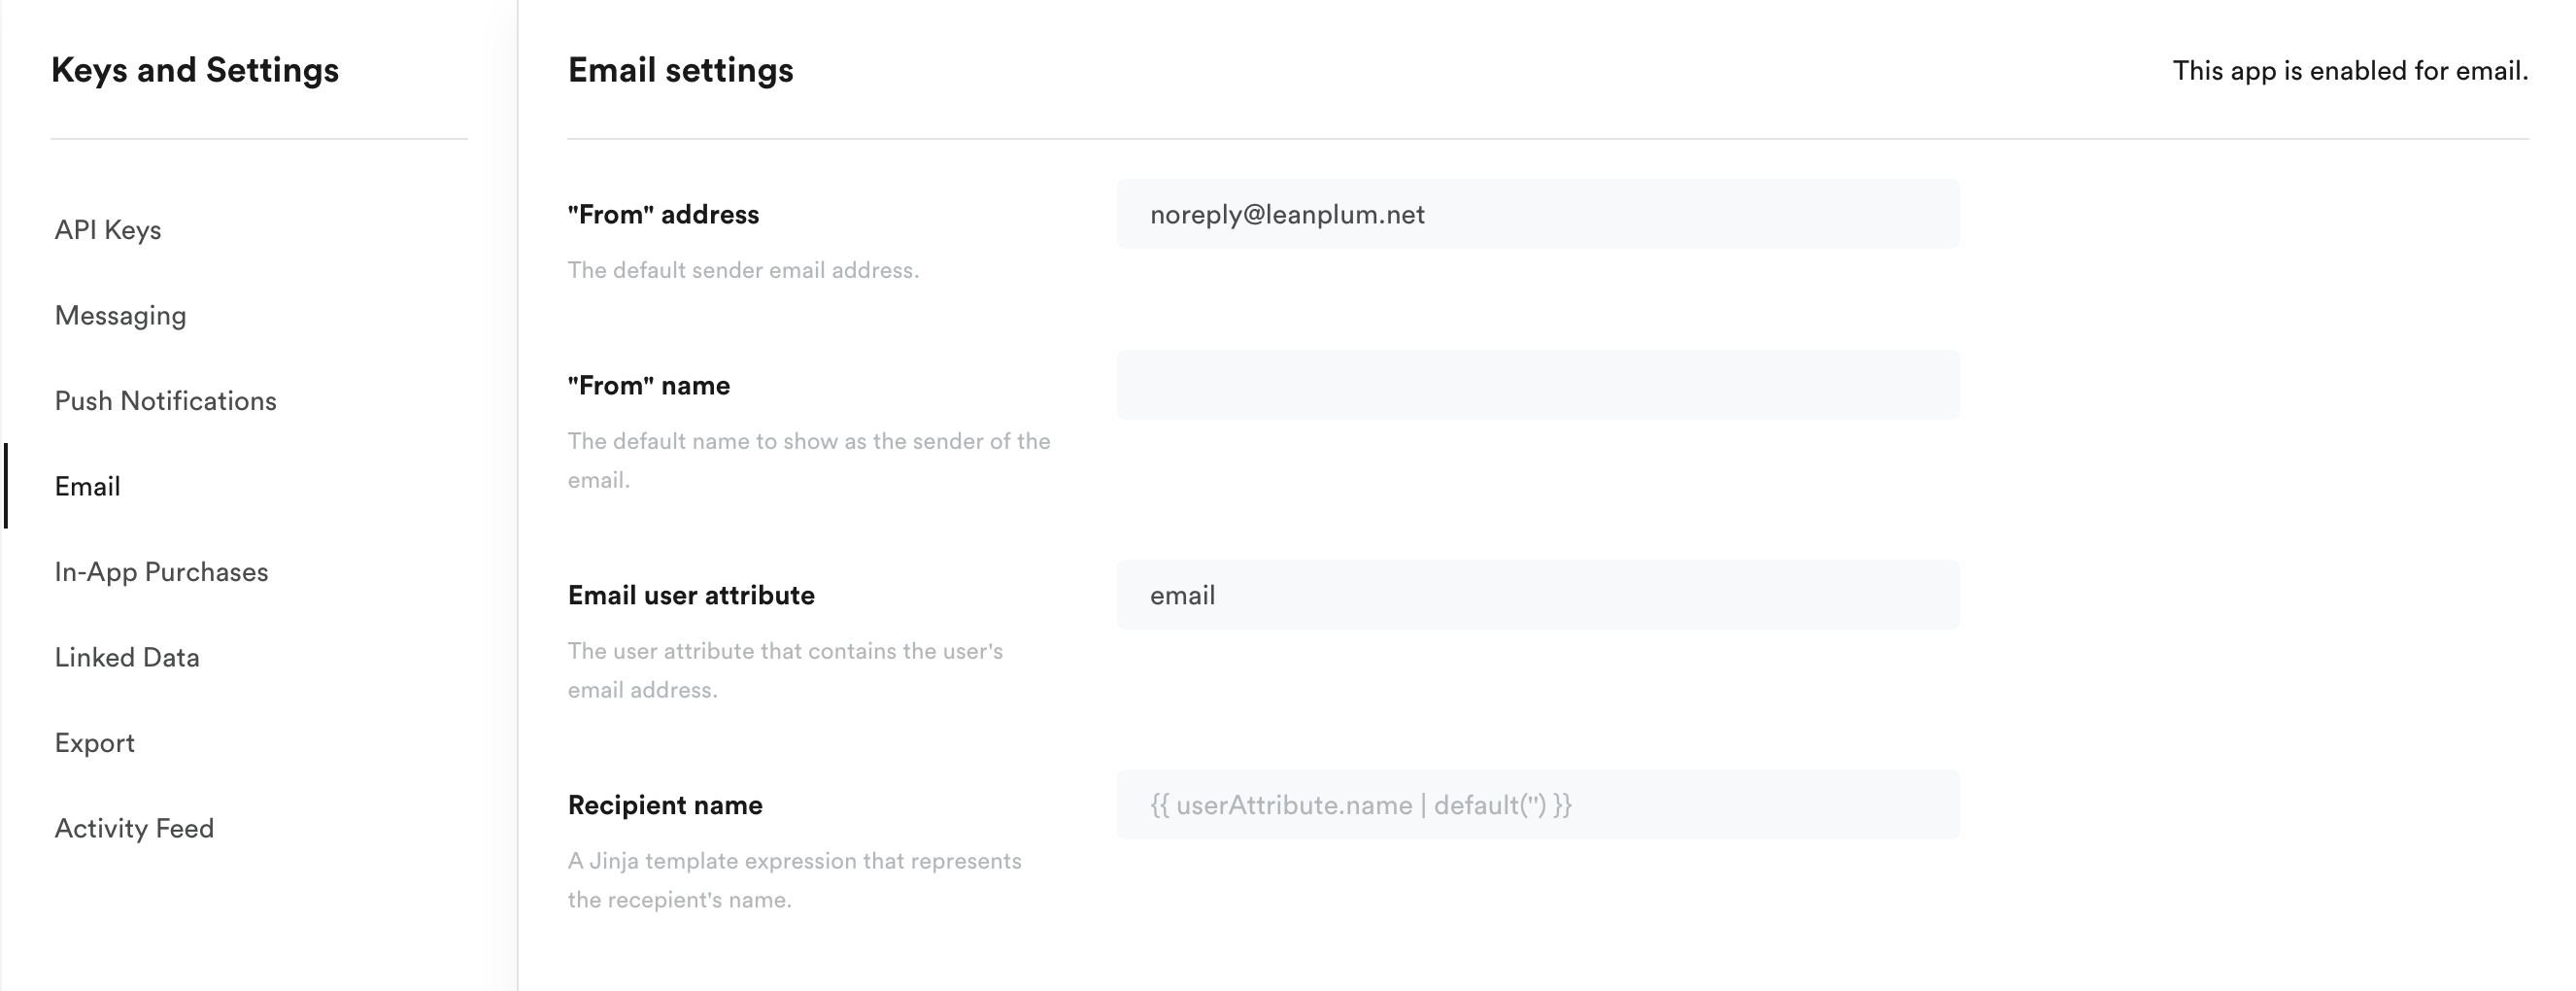
Under App settings > Keys & Settings > Email, there are the following options:
- “From” address: the email address users see as the sender. Defaults to “[email protected]”
Domain names in the From addressMake sure you always use the domain name that was provisioned for your account during your email onboarding. Using non-provisioned domain may lead to authentication, reputation, deliverability and Inbox placement issues. If you are not sure what your provisioned domain is, you can reach out to Support.
- “From” name: the name users see as the sender. Defaults to blank.
- Email user attribute: the user attribute where you are storing the user’s email address. Defaults to ‘email’ (lowercase). You must set this in your app’s code.
- Recipient name: the user attribute you are using to store the user’s name. Defaults to blank.
With the Leanplum default settings, here is how an email would look to users.

Verify Leanplum has your users' email addresses
To see how many valid email addresses there are in Leanplum:
- Click Audiences in the top menubar.
- Click the Create Audience button in the upper right corner.
- Click the + button to add a segmentation rule and select User Attribute.
- Select the attribute for "email."
- Click the operator "is" and select "contains" from the operator dropdown.
- Change the value to "@."
- Hit the Refresh data button in the Insights section.
If "email" is not in your user attributes selector, you'll need to modify your app's code to send the email address as a user attribute to Leanplum.
Updated 5 months ago
