
Satisfaction Survey
The Satisfaction Survey rich in-app message lets you survey your users after they complete some action or reach a location in your app. It works perfectly as a quick post-purchase satisfaction survey, or even a product review.
Create a Satisfaction Survey
Add a new In-app message action, then select Satisfaction Survey as your template. Next, you'll be taken to an editor where you can compose your message.
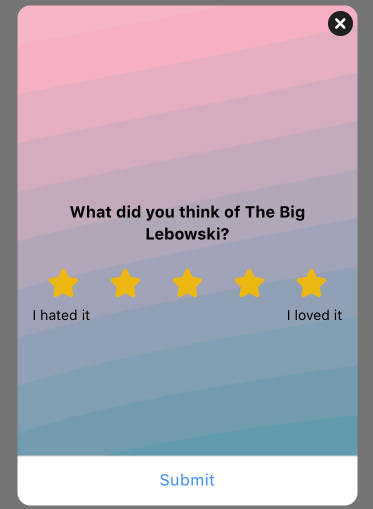
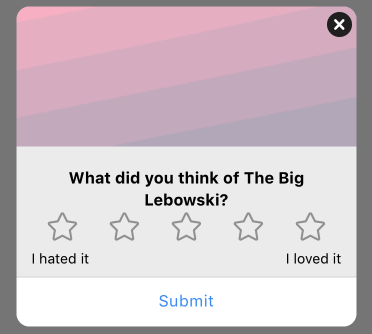
Write a question
Under Survey Question > Text Value, enter your question. It’s best to keep the length of the question to a minimum (since this should be a quick survey), but you can increase the height of the message to accommodate longer questions.
You can also change the High rating and Low rating text, which affects the text above the lowest and highest stars.
Set Sub-Delivery
The Satisfaction Survey is an in-app message, so it must be triggered by some user action. Select the "Display when" trigger.
Include display event parameters
If you use a custom event as the "Display when" trigger, you can set Include display event parameters to “true”. This will allow you to segment the survey results by this custom event's parameters (if it has any) in Analytics.
For example, you could trigger a Satisfaction Survey with your Purchase event, and pass a parameter of productCategory with the event. With this setting enabled, you would be able to segment the Rating results by your product categories.
Change the style
Change the message dimensions
You can set the height and width of the message in absolute px or %. We recommend testing this on a variety of devices in portrait and landscape to make sure it renders well for all of your users.
If there is no hero image, the survey question will always appear at the top of the message. You can add inline html to “nudge” the text down and pull the stars up.
<div style={{ marginTop: "50px" }}> </div>
What do you think of our app?
<div style={{ marginBottom: "-50px" }}> </div>
Add a hero image
You can add a hero image above the survey question. Click Hero Image > Image to open the Image picker, then select the image. You’ll need to adjust the height of the message to accommodate for the image.
The height of the hero image is fixed at 140px and the width is 100% of the message width (defaults to 340px). For best results, use an image with an aspect ratio of 340:140.
Remember, changing the message width will change the hero image's aspect ratio. Widening to 400px, for example, would change the required ratio to 400:140.
Add a background image
You can add a background image behind the survey question and button. Click View > Background image to open the Image picker, then select the image.

Be sure the aspect ratio of the image is equal to that of the message itself (width:height). Otherwise, the background image will be letterboxed to fill in any gaps (see background-size: contain in the MDN docs).
If you set a background image, you might need to change the color and opacity of the submit button to be sure it is visible. The button is transparent by default, which can make it difficult to read on certain image backgrounds.
Change how to close the message
Set Enable background close to “true” so the user can touch outside the message to close it. You can also set Close automatically to “true” to close the message after a set number of seconds. If you enable one of these close options, you may want to hide the close button in the top right by setting Show close button to “false”.
Change the colors
You can set the background, text, and border colors using rgba values (manually or with our color picker). You can also use hex values. To use hex, highlight the rgba value, then enter the hex value to overwrite it.
View and analyze the responses
You can view all the survey responses in Analytics.
Leanplum tracks each of your Satisfaction Survey results with a submit event called <message name> Submit. User responses are stored in the input parameter of this event, which you can view in our Analytics dashboard.
View the survey results
Select your Satisfaction Survey message in the Analytics dashboard, then select the Submit metric tile to view the number of Submit occurrences. To see the actual survey results, group the submit metric by Selected Event > Parameter and select “input” as the parameter.

Since event parameters are not tracked in development mode, you won't be able to view developer responses in Analytics. However, you can verify your parameters are being tracked correctly using the Debugger console.

Filter the results
You can filter the survey results by other metrics including user location, device type, event occurrences, and more. See more on how to filter your data and which filter are available.

Updated 10 months ago