
Create a single message campaign
Create a campaign draft
To create a campaign draft, go to the Campaigns section and click the Create Campaign button at the top right.
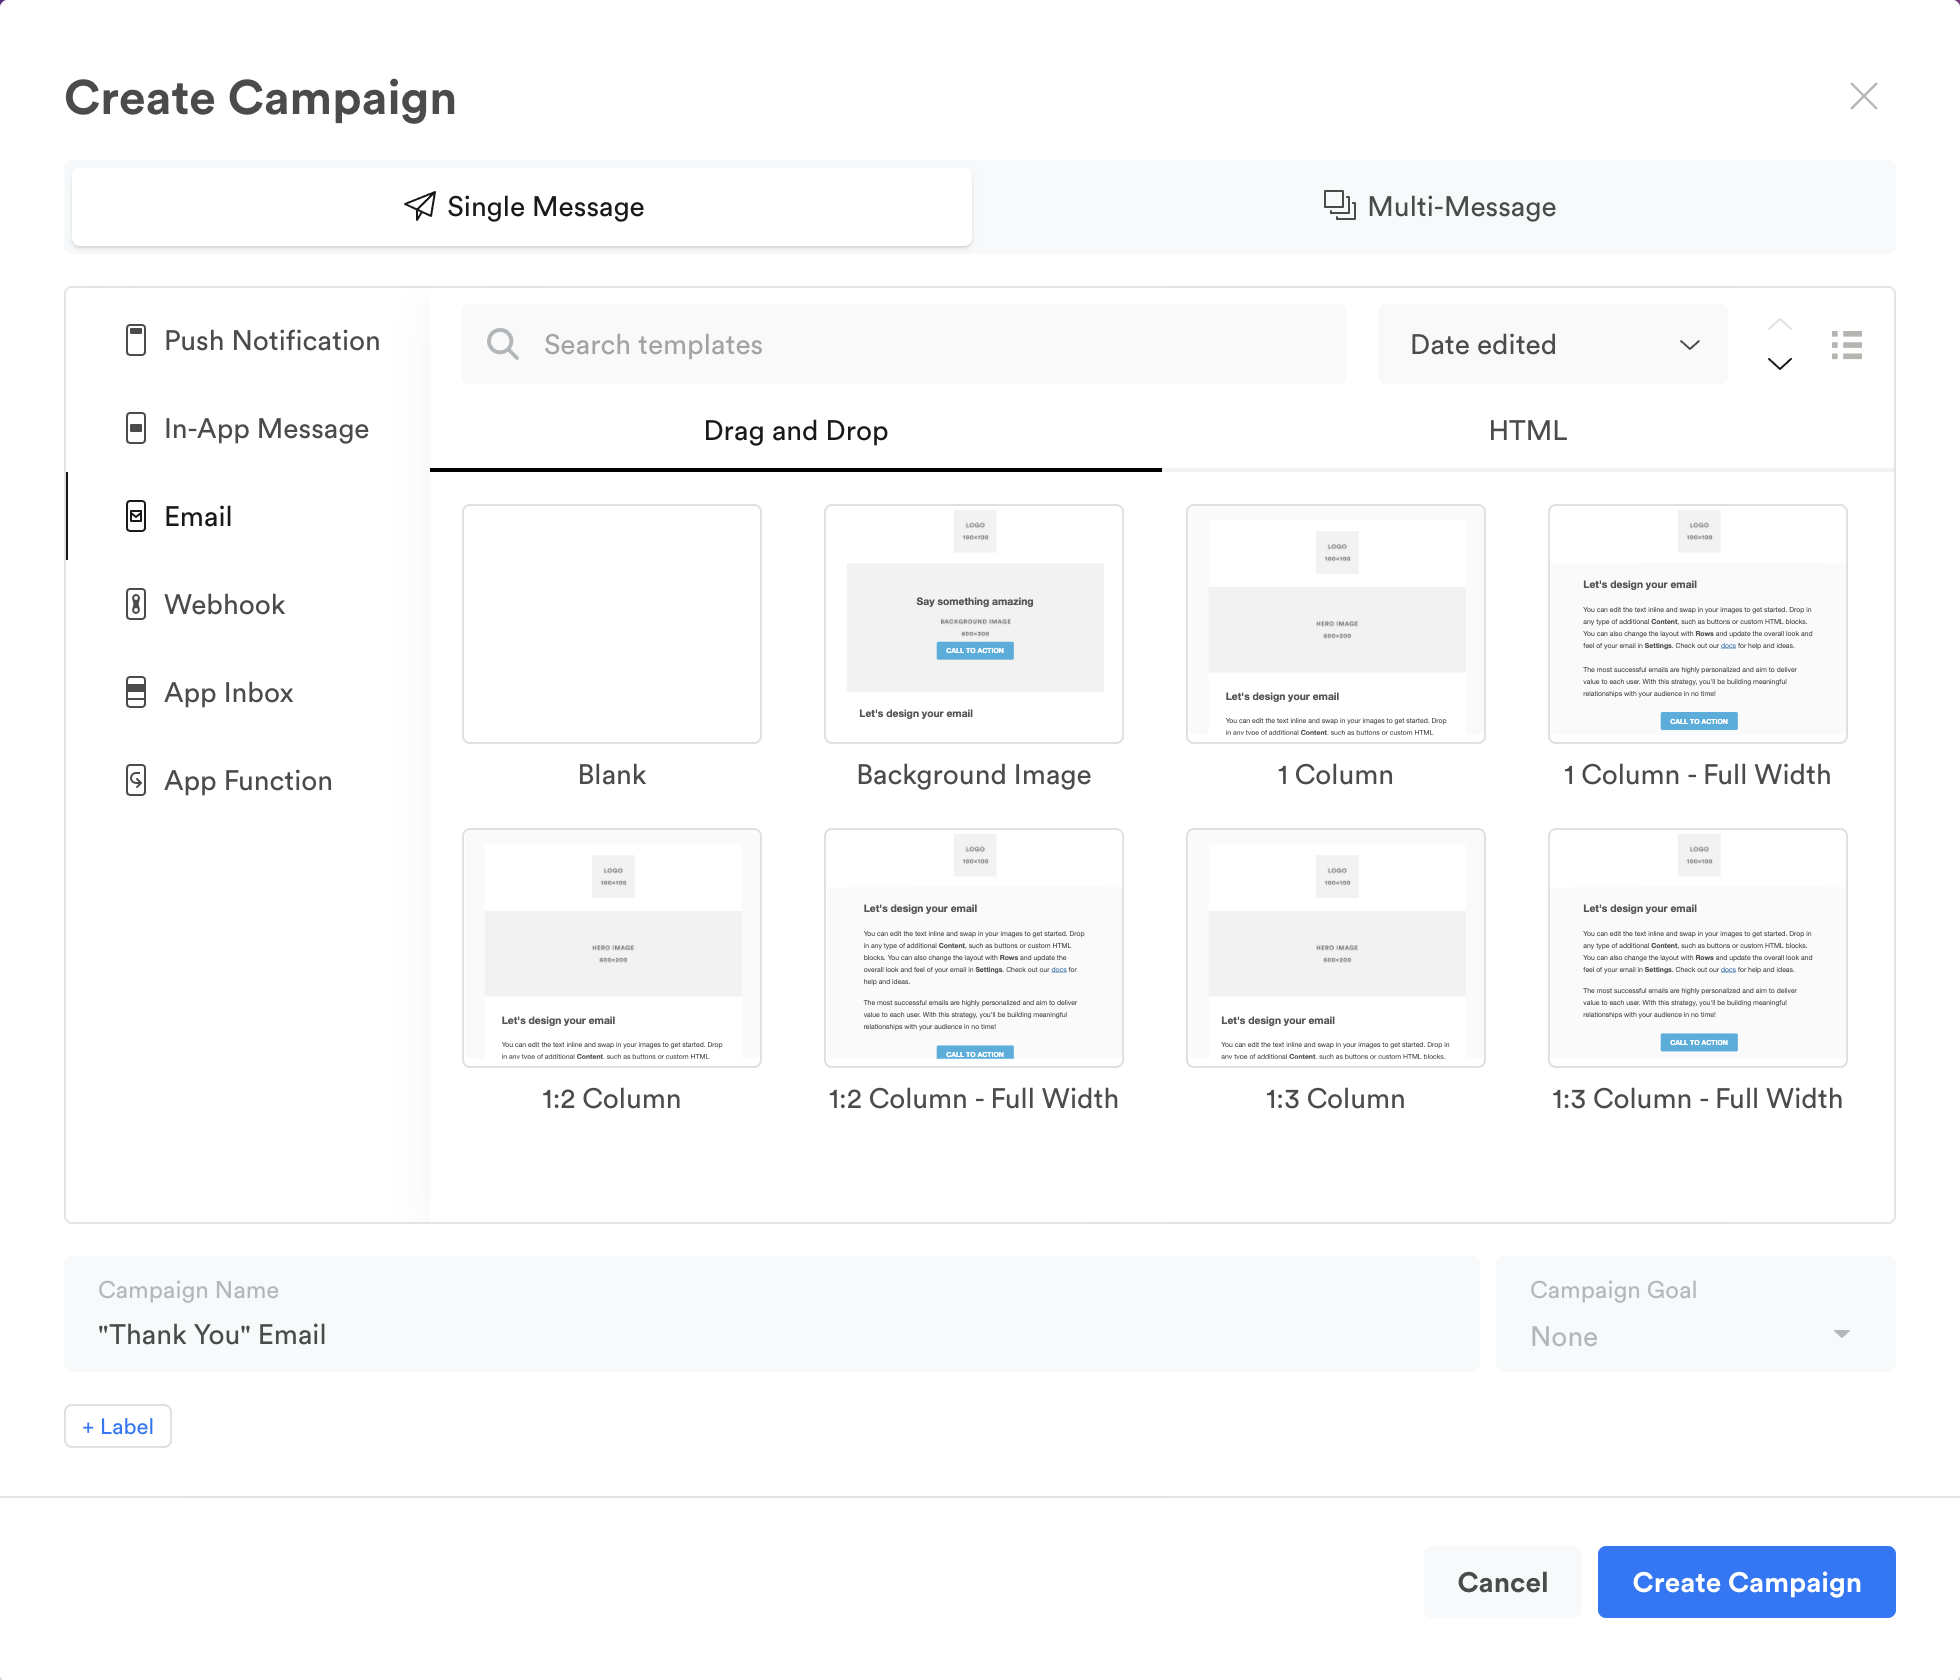
The "Create Campaign" dialog appears.
-
Select Single Message campaign type
-
Select engagement channel and template
Pick one of the links below for more details on specific channels and templates.
| Channel | Description |
|---|---|
| Push Notification | Send a message to your users whether they are in your application or not. Users must have enabled push notifications and have a valid push token to receive these messages. |
| In-app Message | Send a message to users at a chosen place or time within the app. Leanplum offers a variety of in-app templates, including alerts, center popups, confirmations, surveys, interstitials, and rich in-app templates. |
| Send a fully customizable email message to the user’s provided email address. This is a good way to reach users who haven’t opted in for push notifications. (Only available for clients with Email Messaging services.) | |
| Webhook | Send messages or other information to another service, such as an email provider. Webhooks allow Leanplum to give external applications real-time information. |
| App Inbox | Send messages to an inbox contained within your app. App inbox messages are a good way to ensure your users can return to the content you sent, whereas alerts and other types of messages might disappear after the first view. |
| App Function | Sets a custom piece of code into action. Also sends deep links, App review requests, and other system prompts. |
-
Enter a campaign name
-
Select Goal category (optional)
-
Click on Create Campaign to create the single message campaign draft
To publish the campaign, you have to complete without errors all campaign composition steps:
- Message
- Audience
- Delivery

Use the stepper navigation to scroll between different steps.
1. Message
The Message step is where you compose the content of your message.
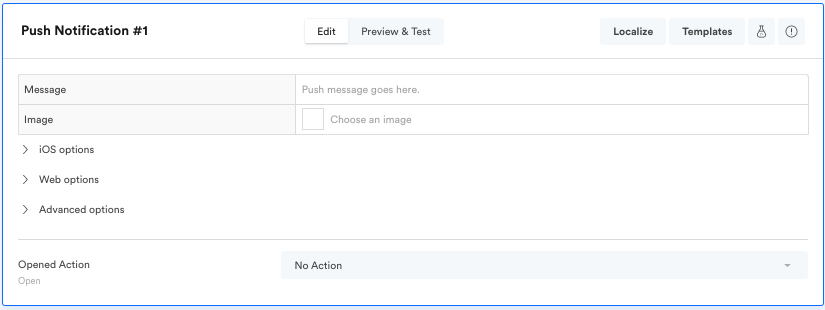
Add a message name
This name appears in Campaign results, Analytics, and CSV exports.
To rename the message, just click on the title.

Switch between Edit and Preview modes
The toggle button in the Message step header provides an easy and quick switch between message Edit and Preview settings.
Localize content (optional)
To create localized versions of your message, click on the Localize button in the Message step header.
Change message template
To select another channel or a different message template, click on the Templates button in the Message step header.
2. Audience
The Audience step determines which of your users can enter the campaign.
Narrow the audience by including or excluding a saved audience. Also, by defining additional rules from the Advanced Mode.

By default, the audience for a new campaign is set to All Users.
For more information, see Audience.
3. Delivery
The Delivery step is where the delivery method, campaign start, and duration are specified.
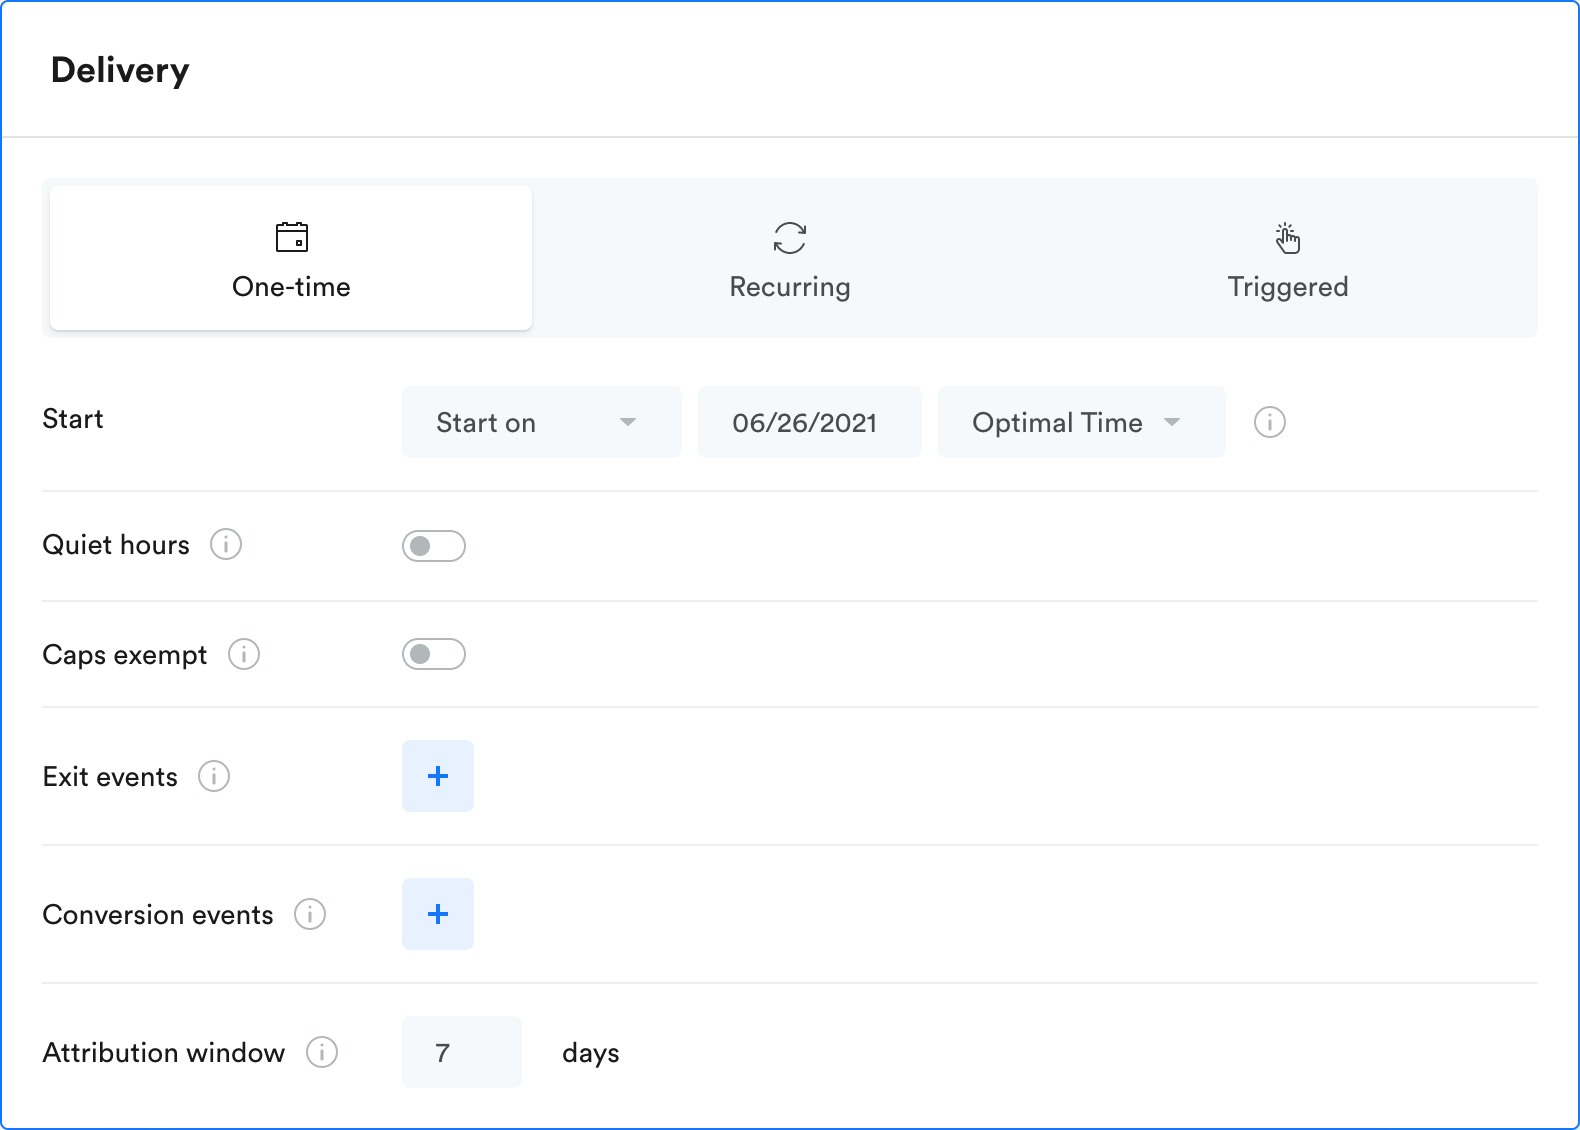
Select between three different delivery methods:
- One-time delivery - the target audience enters the campaign on the scheduled start date and time.
- Recurring delivery - the target audience enters the campaign on a predefined recurrence pattern.
- Triggered delivery - targeted users enter the campaign only when they complete a specific action.
You can also choose optional settings like Delivery limits, Conversion Events, Quiet hours, and more.
For more information, see Delivery.
4. Review and publish
When all steps are completed without errors, the Review & Publish button is enabled. Click it to review the campaign in the summary confirmation dialog:
- To start the campaign, in the summary confirmation dialog click Publish Campaign.
- To cancel the campaign start and make additional edits, in the summary dialog click Cancel.
Based on the delivery configuration the publish button name may differ as it communicates what happens with the campaign after the button is clicked.Examples
One time delivery with immediate start -> Review & Send
Recurring delivery with immediate start -> Review & Start
Recurring delivery with start time in the future -> Review & Publish
A/B test Content in Single Message Campaigns
A/B tests allow you measure what content is the most successful in generating engagement form users. Each test compares a control group of users (Control) against one or several test groups known as variants (B, C, etc.). By testing different content combinations, you can determine which performs best with your users.
When testing campaigns, we recommend:
Starting the test when you start the campaign, and allowing the test enough time to demonstrate results.
Testing one incremental change at a time. This gives you the most accurate data with which to make informed decisions moving forward.
1. Create a new A/B Test
A/B tests are built into your Single Message campaigns, and you can add an A/B test to any campaign you create by using the Flask icon.

2. Add variants
You can add additional variants via the + Add button, and can decide on the relative populations for the control and other options via the cogwheel button.

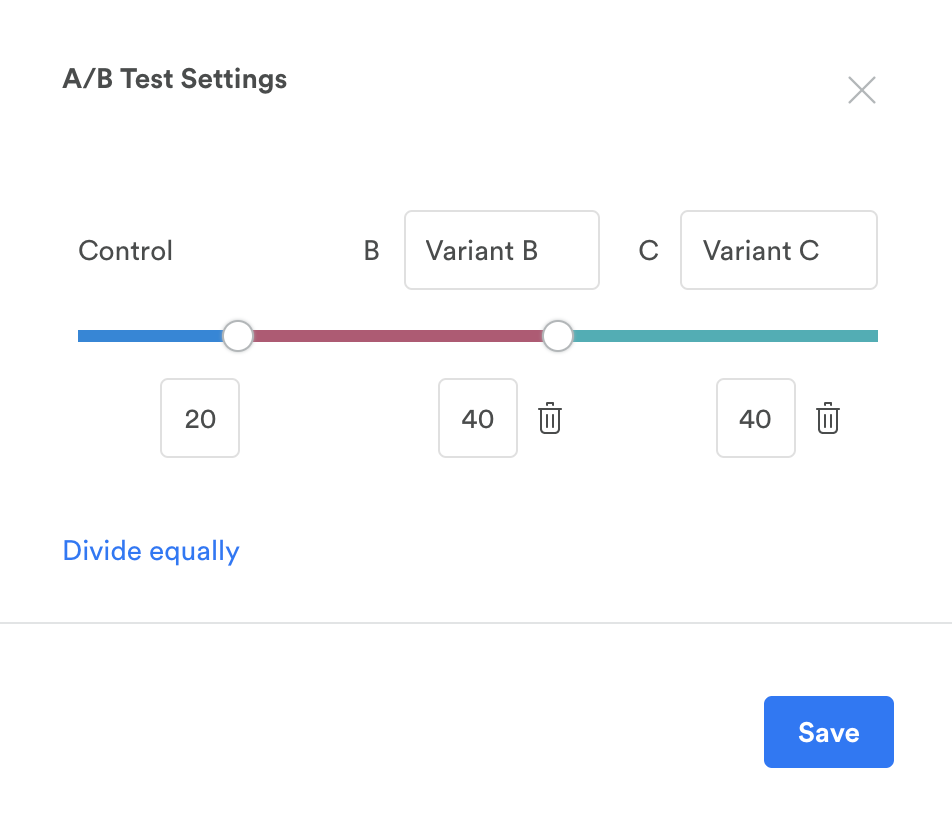
3. Changing the variants
You can enter the A/B Test settings via the cogwheel button. In the pop-up you can:
- change the name of each variant
- change the sample for each variant manually via the slider, or with the Divide equally button
- remove variants via the big button next to each sample size
4. Testing the content
When created each variant will have content identical to the Control version. You can navigate to each variant and change the text, images used and etc. for each variant.
Audience and Delivery A/B TestingThe Single Message A/B test allows you to test only the content of the message, changes made to the Audience or Delivery settings will affect the Control and all variants.
5. Finish an A/B test
Once the test has reached statistical significance and you are satisfied with the results, you can complete the test by clicking the Finish A/B Test button located in the top bar inside the campaign.
Finishing an A/B test does not end the campaign. It rolls out the selected winner to all users in the campaign.
Currently, we can create only one A/B test for a single campaign.
If you need to create a new A/B test for a campaign with a similar setup, you can make a new copy of it.
Choose a winner. Click "Finish A/B Test," then select one of the test groups as the winner. Choosing a winner will end the test. All users that are still going to receive content from the campaign will get these winner action from this moment on.
Regardless of which variant is most successful, you are ultimately in control of which version you deliver to your users.
6. Results and reporting
You can analyze the results of the A/B test in Single Message Campaigns via our Analytics page, see A/B test analytics
Campaign management options
From the ••• (More Options) dropdown you can:
- Review and edit Campaign Settings such as Name and Labels
- View Campaign Summary
- Duplicate Campaign
- Delete Campaign
For more information, see Managing Campaigns.
Updated 11 months ago