mParticle SDK
The mParticle SDK integration allows you to include Leanplum's kit within the mParticle SDK, which unlocks Leanplum messaging functionality (push, in-app, app inbox) and streamlines data collection into both mParticle and Leanplum.
This integration supports iOS, Android, Unity and Web/JS.
This article provides guidance on how to integrate Leanplum in your Android, iOS, Unity or Web/JS project using mParticle.
For mParticle Dashboard setup and information on which Leanplum features are supported by mParticle, visit mParticle's docs.
Android
The Leanplum Kit requires that you add Leanplum's Maven server to your buildscript:
repositories {
    maven {
      url "https://repo.leanplum.com/" //only needed for Android SDK versions below 4.3.0
    }
    maven {
      url "https://maven.google.com"
  }
    ...
}
Add the kit dependency to your app's build.gradle:
dependencies {
    compile 'com.mparticle:android-leanplum-kit:4+'
}
Follow the mParticle Android SDK quick-start for any additional dependency to be added to your project.
Add the following to your Gradle dependencies necessary to collect the Android Advertising ID:
compile 'com.google.android.gms:play-services-ads:9.0.0'If using mParticle version v5.12.3 or newer, in order to receive InstallReferrer data, add the following dependency to your build.gradle:
implementation 'com.android.installreferrer:installreferrer:1+'For older versions (v5.12.2 and bellow), add the following in your AndroidManifest Application class:
<receiver android:name="com.mparticle.ReferrerReceiver" android:exported="true">
    <intent-filter>
        <action android:name="com.android.vending.INSTALL_REFERRER"/>
    </intent-filter>
</receiver>
The above is required to capture attribution data via the Google Play install referrer broadcast. When Google Play installs an application it will broadcast an Intent with the com.android.vending.INSTALL_REFERRER action. From this Intent, mParticle will extract any available referral data for use in measuring the success of advertising or install campaigns.
For Leanplum, you will need Google Play Services in order to use Leanplum Push Services and Leanplum localization services. If you need those services, include also the following in your Gradle dependencies:
compile 'com.google.android.gms:play-services-gcm:9.0.0+'
compile 'com.google.android.gms:play-services- location:9.0.0+'
Rebuild and launch your app, and verify that you see "LeanplumKit detected" in the output of 'adb logcat'
Android Sample Project
Android sample project is available here.
Leanplum support for mParticle
The mParticle SDK supported Leanplum features are:
- Marketing Automation (In-App messages)
- A/B Testing (Messages)
- Analytics (Tracking events)
Along with the mParticle SDK, the Leanplum SDK would also be accessible for using all the other Leanplum features not available out of the box through mParticle (for example setting Variables or Customizing Push Notifications).
Events in mParticle
To track events through mParticle, the suggested approach is to define a Custom Event. In that way also the parameters can be properly passed to Leanplum.
See the sample project.
Map<String, String> eventInfo = new HashMap<String, String>(2);

eventInfo.put("spice", "hot");
eventInfo.put("menu", "weekdays");

MPEvent event = new MPEvent.Builder("Food Order", MParticle.EventType.Transaction)
        .duration(100)
        .info(eventInfo)
        .build();

MParticle.getInstance().logEvent(event);
Event name is in this case "Food Order" string.
The event parameters are passed as an argument of info().
iOS
To integrate with mParticle via CocoaPods, follow these steps:
1. Add a Podfile

In terminal, navigate to your app's directory. Add a Podfile to your app by running the following command:
$ pod initOpen your Podfile by running the following command:
$ open -a Xcode Podfile2. Inserting and Installing the mParticle-Leanplum

Insert the following line of code into your Podfile:
pod 'mParticle-Apple-SDK'
pod 'mParticle-Leanplum'
You will also need to include:
source 'https://github.com/CocoaPods/Specs.git'

inhibit_all_warnings!
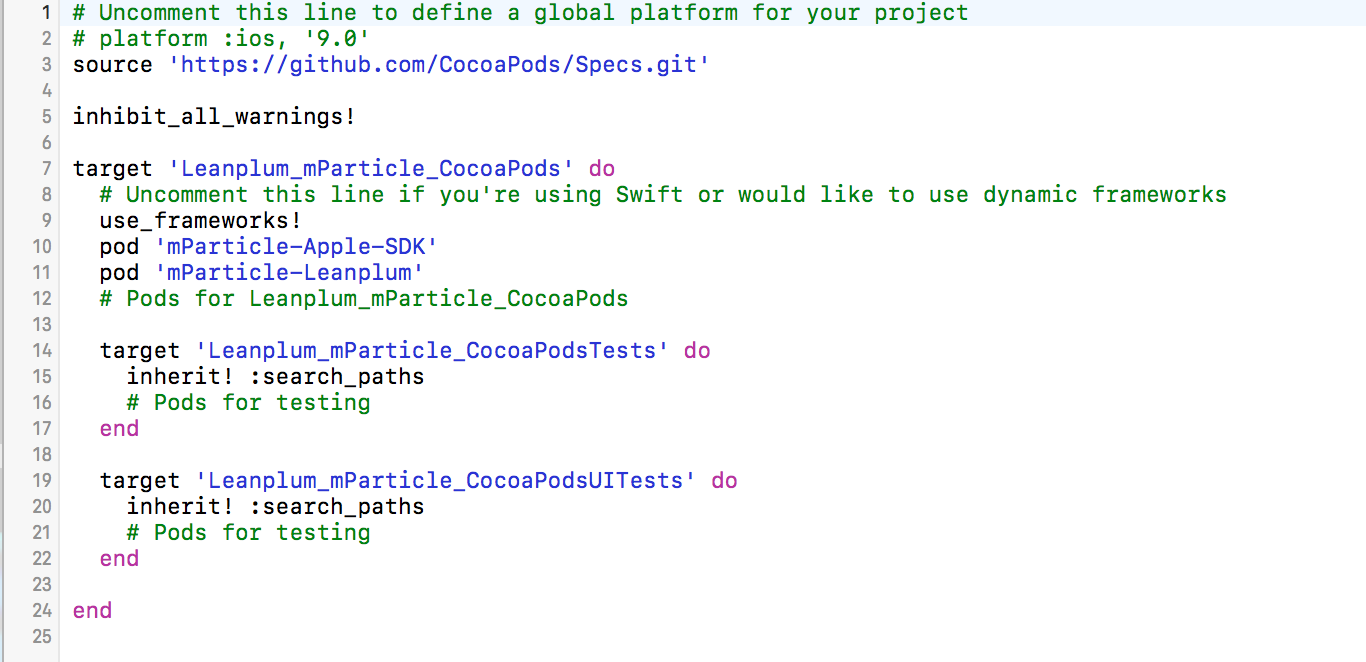
Your Podfile should look like this:

Now, install the Pods by running the following command:
$ pod install
3. Setting up AppDelegate

Then, to appropriately run mParticle, set your AppDelegate as follows:

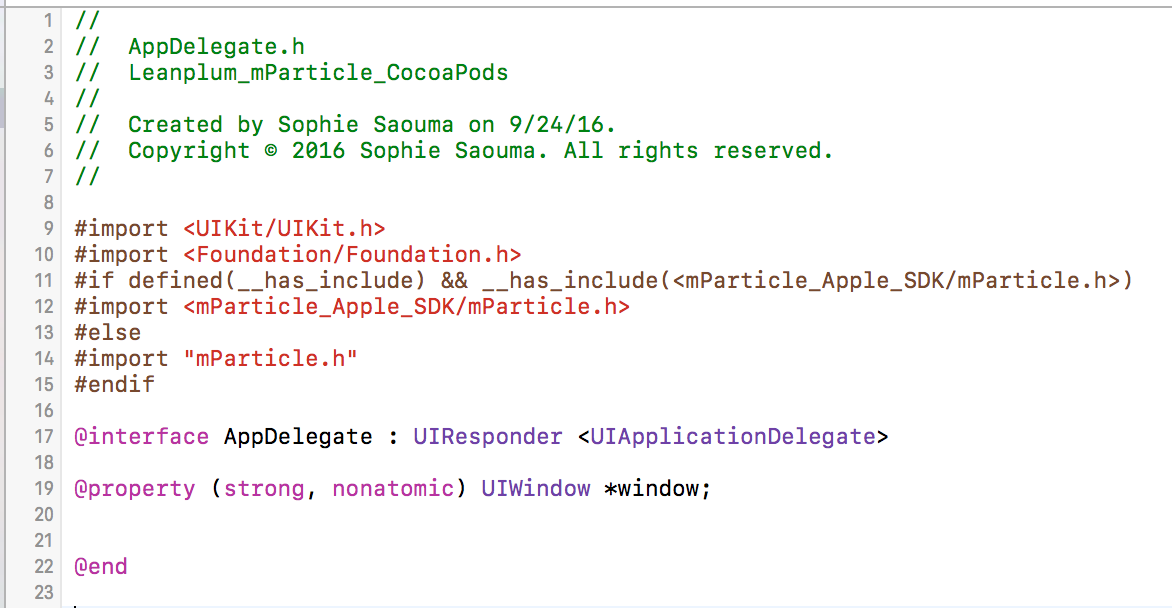
You will need to include the following snippet in order to call any Leanplum advance feature:
#import <Foundation/Foundation.h>

#if defined(__has_include) && __has_include(<mParticle_Apple_SDK/mParticle.h>)

#import <mParticle_Apple_SDK/mParticle.h>

#else

#import "mParticle.h"

#endif
```
In your AppDelegate.h

Then, in your AppDelegate.m, you will need to add:
```
# import <Leanplum/Leanplum.h>
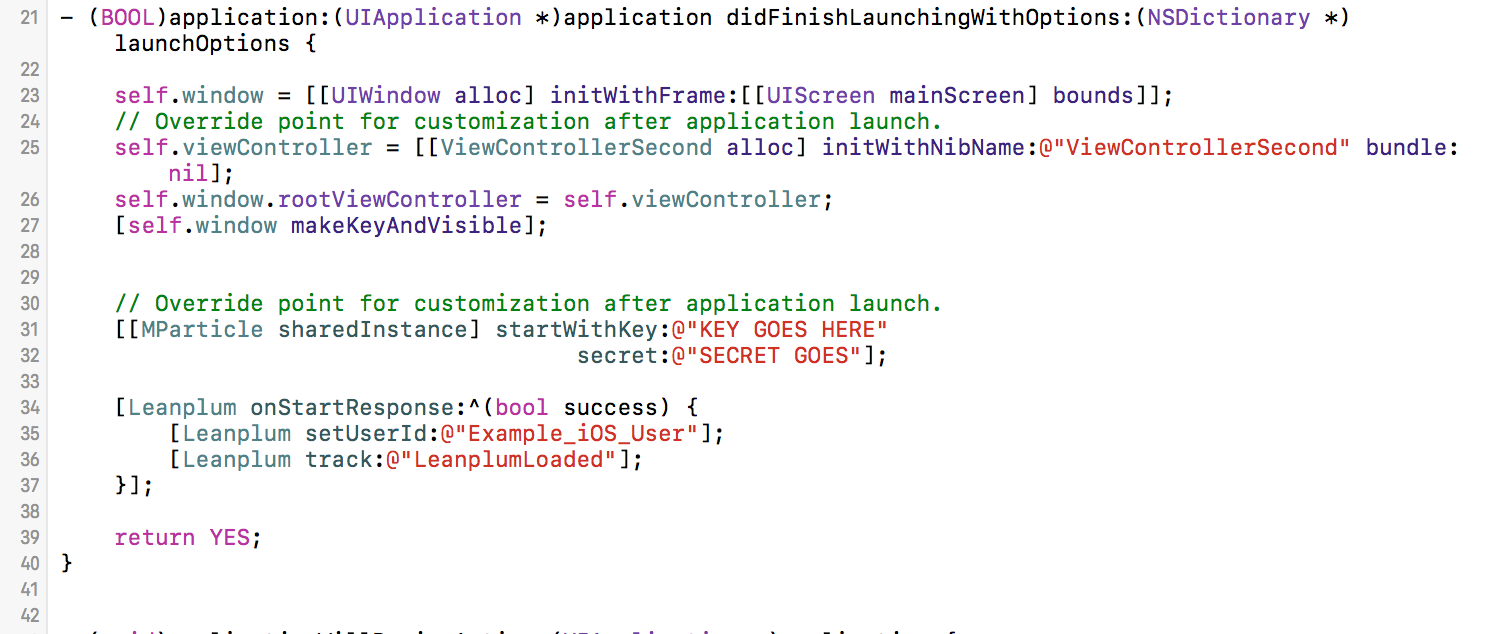
Additionally, you will need to include in didFinishLaunchingWithOptions:
[[MParticle sharedInstance] startWithKey:@"KEY_GOES_HERE"
                                      secret:@"SECRET_GOES_HERE"];
This automatically calls Leanplum Start. After this call, you can call Leanplum calls such as [Leanplum setUserId:@"exampleUser"];
For reference, your AppDelegate.m could appear as follows:

JavaScript
To integrate Leanplum with your mParticle JavaScript SDK, use the mParticle Leanplum JS kit as during the mParticle SDk setup. For the full guide, refer to the mParticle documentation. For reference, the Leanplum kit is CDN-Based
For more information on how web data is forwarded, see the mParticle help topic on forwarding web data.
Unity
Unity wrapper SDKs for iOS and Android can be used with mParticle for client-side integration as well.
- Add the mParticle Unity Plugin
- Add the Leanplum Unity SDK (for iOS or Android). This ensures the resulting project will have all dependencies needed for the integration to work out of the box.
- Add the mParticle Leanplum kit
3.1 For Android:
Add mParticle Leanplum kit in mainTemplate.gradle.
3.2 For iOS:
Copy the sources or framework for mParticle Leanplum kit.
Updated 5 months ago
