Lifecycle Campaigns
One of the most common use cases for creating a Lifecycle Campaign is to re-engage lapsed users. As such, this is a great campaign to set up as your first Lifecycle Campaign.
Building a Lifecycle campaign
We are going to create a campaign that users will enter when they first start the app. Every time they start the app, a delay period will begin, leading up to a queue that will send them a series of messages. If they come back into the app before the time the first message should send, they will not receive the campaign yet, and instead the delay will start over. This automates the process of sending a message after the user has left the app for a specified number of days.
To create this Lifecycle Campaign:
- Navigate to the Messaging dashboard.
- Click the Create Campaign button in the upper right corner.

- Name your campaign "Lapsed users re-engagement."
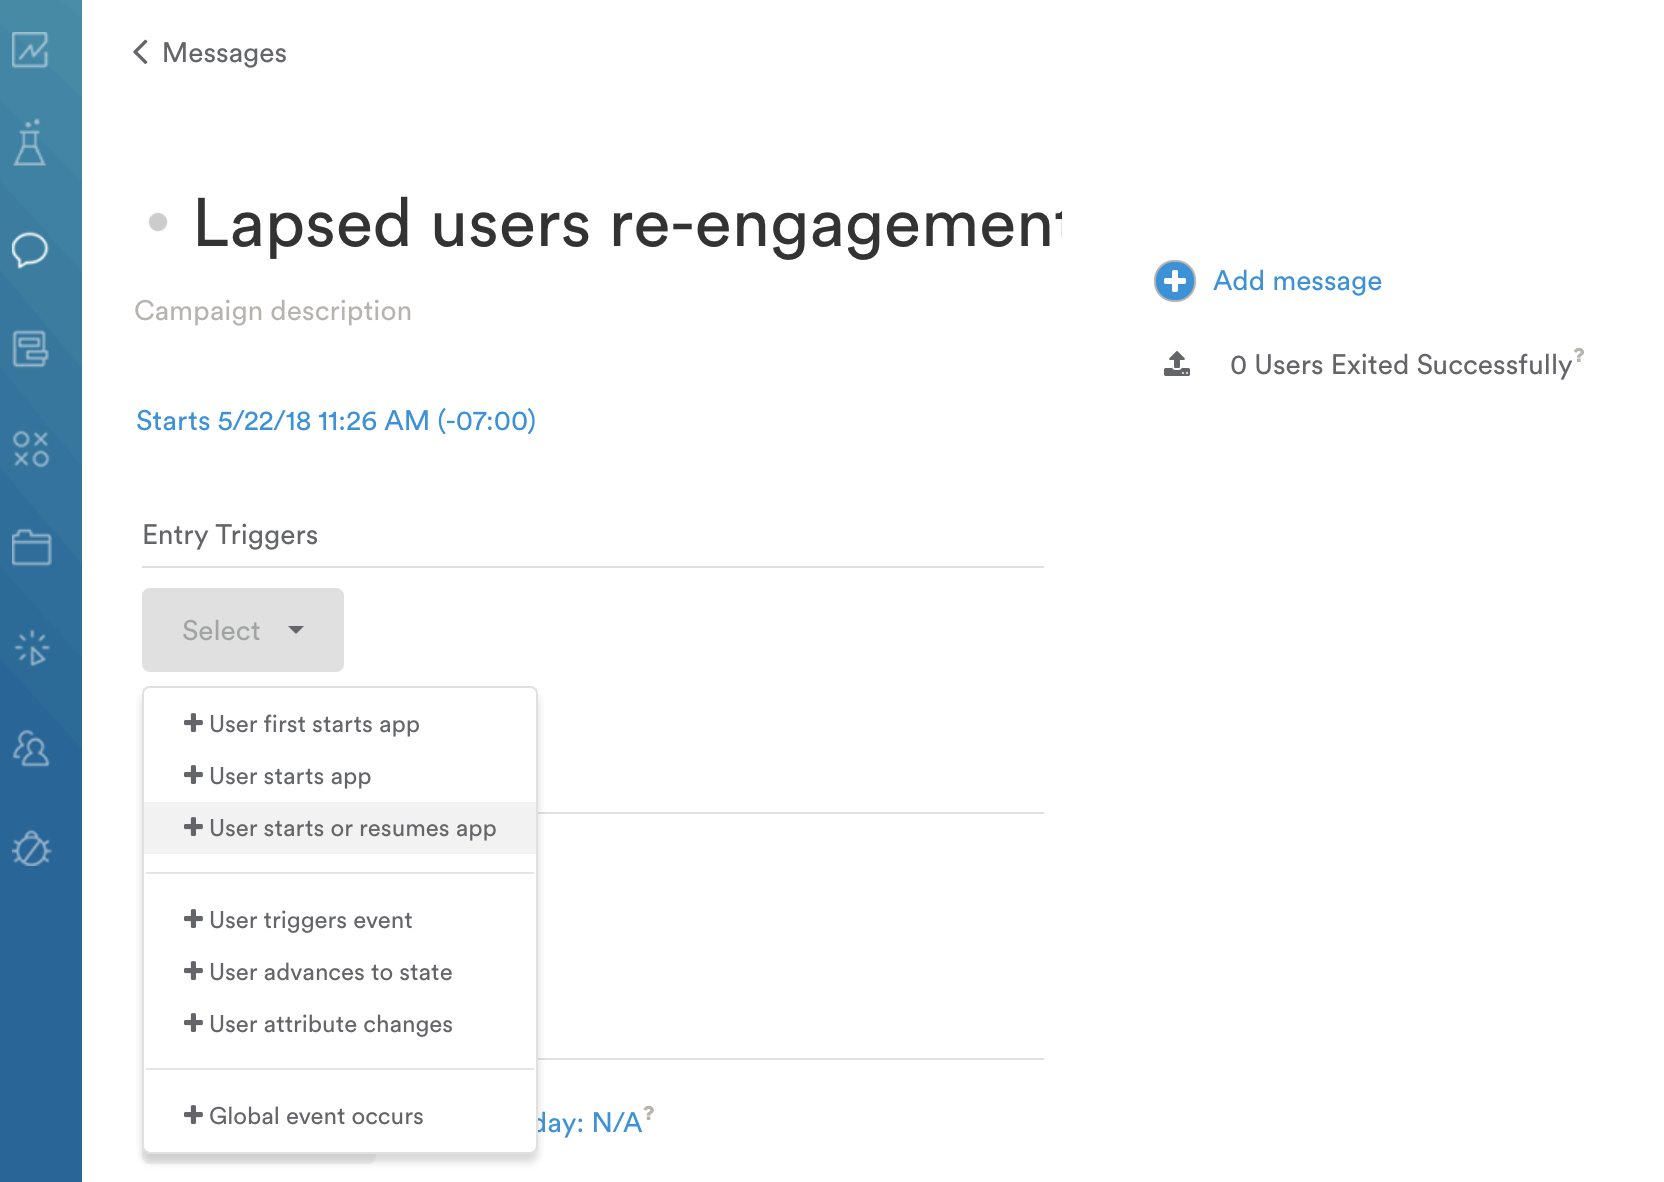
- For the Entry Trigger, select "User starts or resumes app." This is the action a targeted user must complete in order to be entered into the campaign.
- For the Exit Trigger, select "User starts or resumes app." This is the action a user must complete in order to be released from the campaign.

14 day attribution window for no-exit campaignsIf you don't have an Exit trigger for your campaign, users will stay in the campaign for 14 days after receiving their final message. After 14 days, they will drop out of the campaign. Users who exit the campaign or drop out after the attribution window may be eligible to re-enter the campaign.
- Click
 to add your first message.
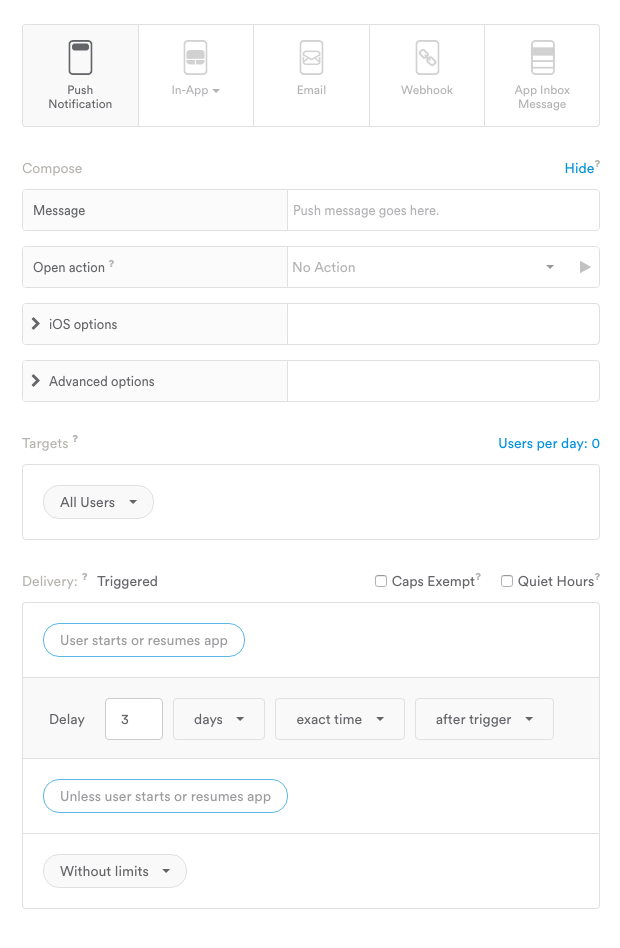
 - Name your message, type your message copy, and select whichever message type you want to use (we recommend a push notification). You'll notice that targets and entry and exit triggers have been automatically inherited from the Lifecycle Campaign.
- Set the message delay. For this example, we recommend a message delay of 3 days. The push notification will be sent to the user three days after they complete the entry trigger of starting or resuming the app.

- Click the Start button to set the message live.
- Return to the Lifecycle Campaign page. You’ll see a timeline of all messages that are part of this campaign; to the left of the first message you created, it will say "3 Days."

- Repeat steps 6-10, creating two more messages with delays that you choose (we recommend delays of 5 and 7 days respectively).
- When you're ready to launch the campaign, click Start Campaign.
Congratulations, you’ve created your first Lifecycle Campaign! Feel free to contact [email protected] for more Lifecycle Campaign recipes or any other questions.
Updated 4 months ago
