User attributes and events for segmenting messaging campaigns
In this tutorial we are going to set user attributes, how to track events, and how those can be combined to add segments for messaging campaigns.
User attributes
See User attributes for more on defining and using user attributes.
Given their flexibility, User Attributes are very useful for assigning any piece of data to a User (Gender, Email, Name/LastName, Interests...). This information can be used when defining targets for a messaging campaign, as well as for passing data that can be used to populate the content of a message.
Events and parameters
See Events for more on defining and using events.
Once an Event is tracked, it will be present on the Dashboard and can be used, other than for Analytics, also for triggering Messaging campaigns.
Sample
Android sample project here.
iOS sample project here.
In the sample proposed, we have placed two buttons for setting User Attributes and one for Tracking an Event.
The code executed is very simple.
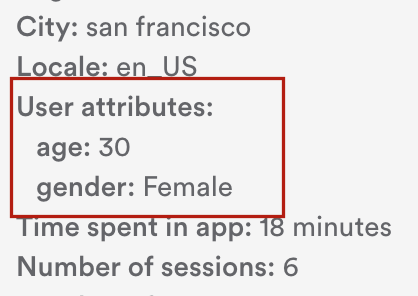
- First button is setting User Attributes 'gender' and 'age' respectively to 'Female' and 30.
static Map<String, Object> attributes = new HashMap<String, Object>();
attributes.put("gender", "Female");
attributes.put("age", 30);
Leanplum.setUserAttributes(attributes);- Second button is setting User Attributes 'gender' and 'age' respectively to 'Male' and 36.
static Map<String, Object> attributes = new HashMap<String, Object>();
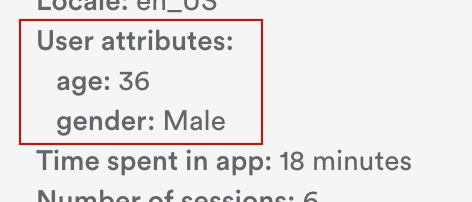
attributes.put("gender", "Male");
attributes.put("age", 36);
Leanplum.setUserAttributes(attributes);- Third button is tracking an event called 'Test_Event' also passing a Parameter value '12345'
static Map<String, Object> params = new HashMap<String, Object>();
params.put("Test_Param", 12345);
Leanplum.track("Test_Event", params);
Click on the First button to set User Attributes and check the User Profile: you will notice the User Attributes are displayed there.
Now click on the Second button to set the same User Attributes using different values. You will notice the User Attributes are being updated with the new values.
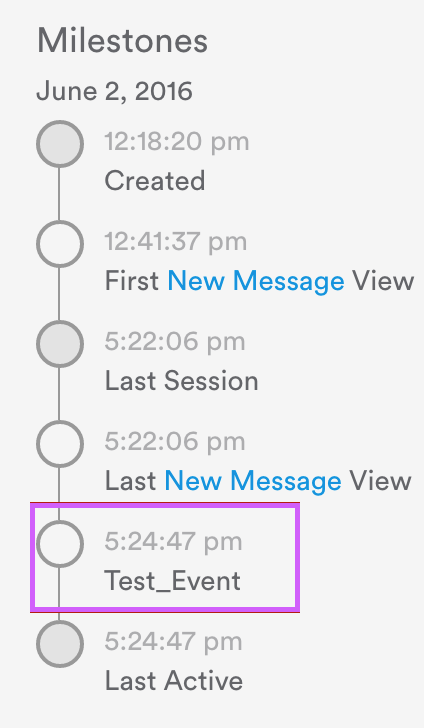
Click on the 'Track event' button to track a 'Test_Event' passing also a parameter ('12345'): you will be able to see the event being tracked in the User Profile under the User milestones, as well as now having the event name listed in the Events section.
Setting up a messaging campaign
Setting user attributes as targets and event triggers

Now that the User Attributes and the Event are present on the Dashboard, once we setup a messaging campaign, we'll be able to find those once adding segments for the Target and Delivery options.
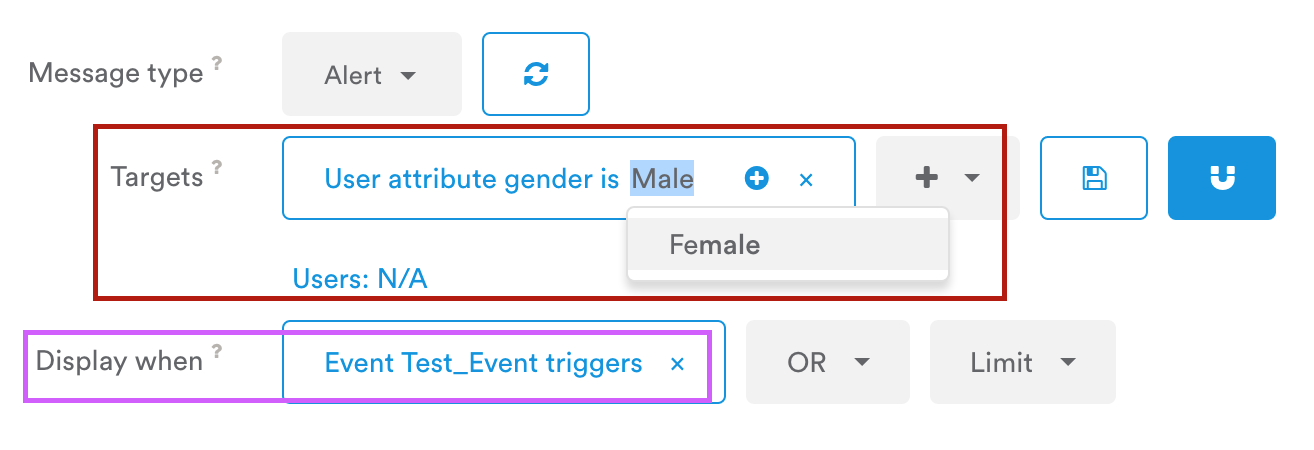
Create for example a new Alert message and choose Target -> User attribute. You will see that also 'gender' and 'age' are now an option.
Any value can be obviously edited, but you would find that values already used by the client are being also displayed and choosable.
Below, under 'Display when' we can choose also when a certain event is being triggered. In our case, 'Test_Event'.
Publish the Messaging campaign. Set User Attributes and restart the app.
Trigger the messaging campaign clicking on the app 'Track Event' button (i.e. calling 'Leanplum.track("Test_Event", params);) : depending on which User Attribute value is being set, the Alert message will be displayed or not (after setting the User Attribute, make sure the app is relaunched).
Inserting User Attributes values as part of the message

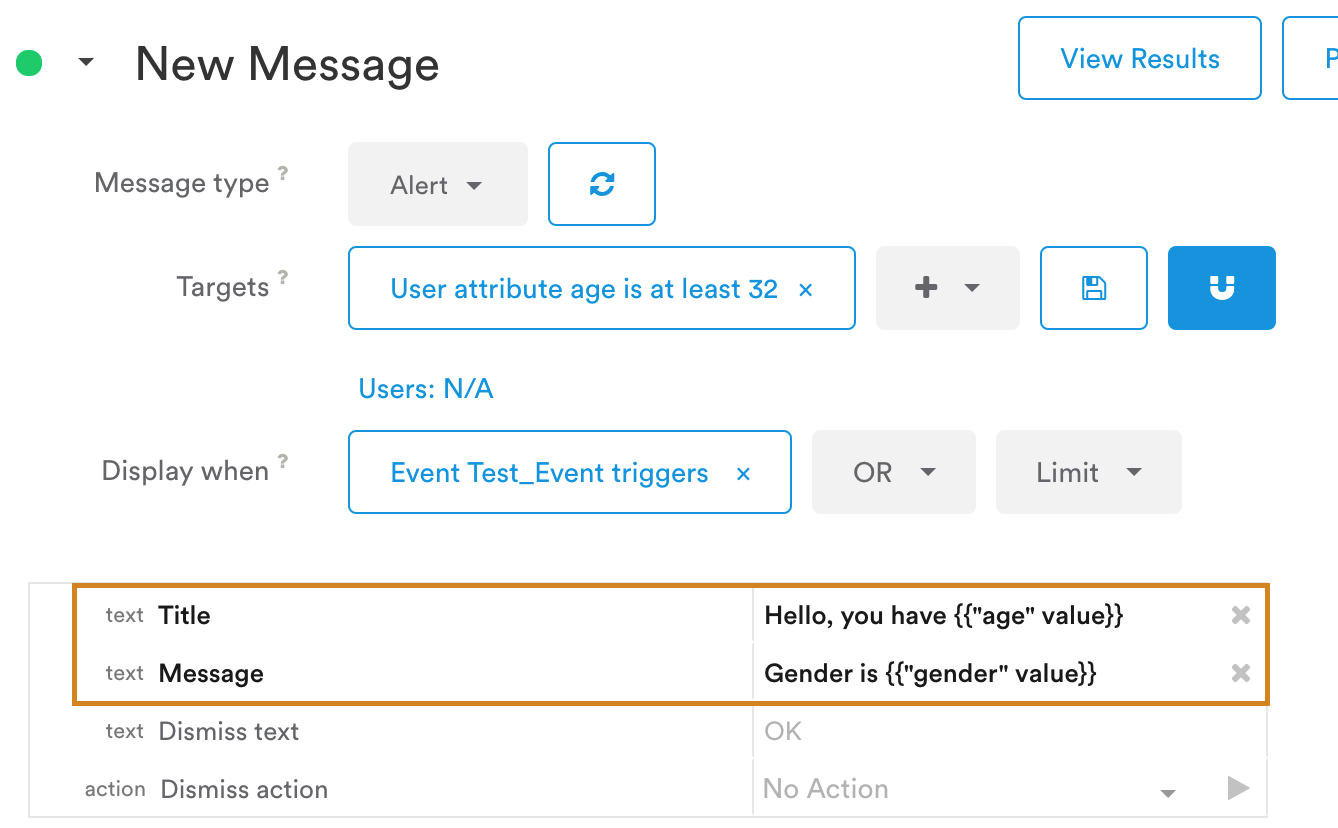
Another use of user Attributes is to populate the message itself with User Attribute values and fully customize the messages with personalized content based on the User.
For example, we could add Gender and Age values by using the following syntax in the messages:
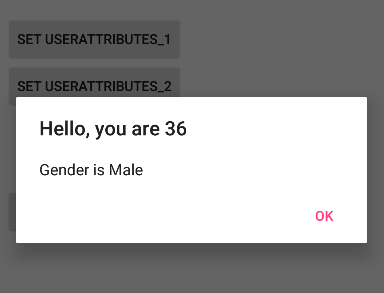
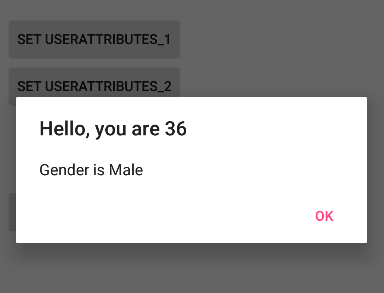
And in this case, on device, the Alert message would be:
Updated 3 months ago
